

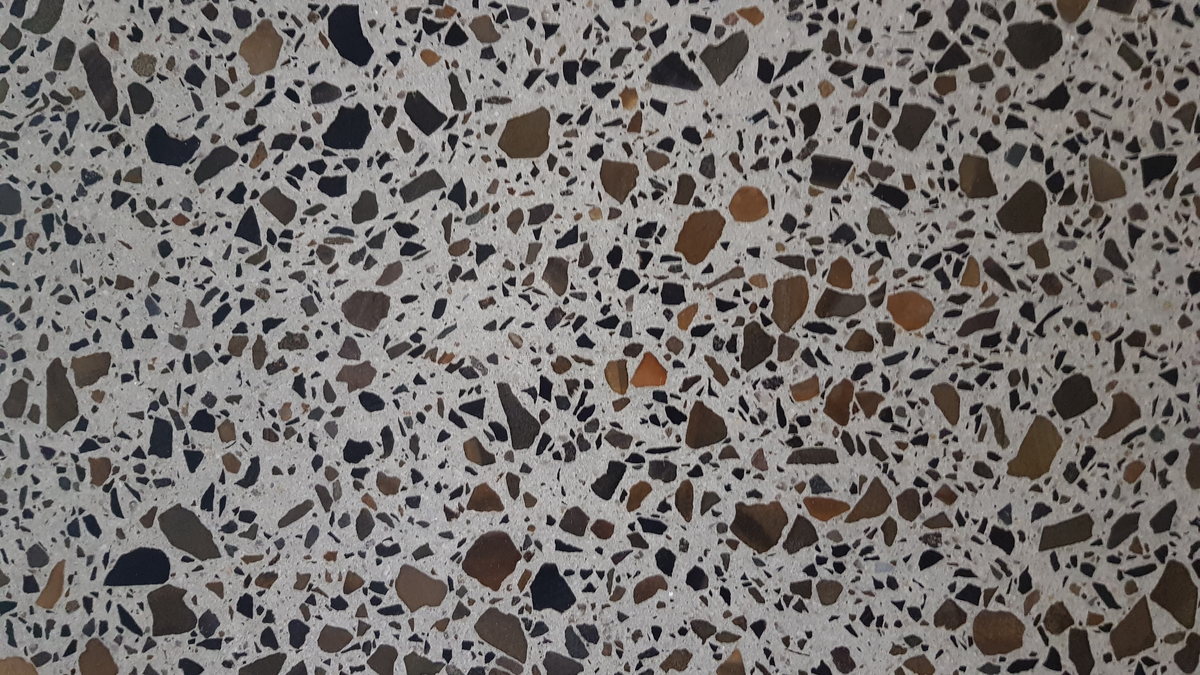

When people picture polished concrete, they’re often picturing a particular amount of stone showing in the surface — from a floor scattered with large pebbles to one that looks almost like smooth, plain cement. That amount of visible stone is what "aggregate exposure" describes, and it’s one of the biggest decisions in the look of a mechanically polished floor. This guide explains the exposure levels, what drives them, and — importantly — why the finished result depends heavily on the slab itself. It’s written for homeowners first, whether you’re planning a new home across the Mornington Peninsula or refinishing an existing slab, but it’s just as useful for builders and designers specifying a floor.
First, a note on terminology
There’s no single, universal naming system for exposure. Terminology varies between contractors and specifications, so the same floor might be described differently by two suppliers. On our website we use four terms — Full, Random, Minimal and Nil — and we explain what we mean by each below. Treat these as our working descriptions rather than fixed industry standards, and when comparing quotes it’s always worth checking that everyone means the same thing by a given word.
One common mix-up is worth clearing up: "random exposure" and "salt-and-pepper" are not automatic synonyms. Salt-and-pepper generally refers to a fine exposure of the sand and smaller particles, giving a speckled look with little or no large stone. Random exposure describes a variable pattern — a mix that changes across the floor rather than a single consistent level. They can overlap in appearance, but they’re describing different things.
The exposure levels (as we use the terms)
Full aggregate exposure. The floor is ground deeper so that the larger stones in the concrete are cut into and clearly visible across the surface, giving a bold, terrazzo-like look with plenty of stone. It makes a strong design statement, but it depends entirely on the slab actually containing suitable, well-distributed aggregate at that depth.
Random exposure. Rather than a level you dial in, random exposure is usually what results when a lighter or more selective cut meets the high and low areas of a slab differently — so the amount of stone showing shifts across the floor instead of staying uniform. That varied, organic pattern can be genuinely attractive, and many people happily accept it, or actively choose it, as the aesthetic. What it generally can’t be is precisely controlled or deliberately manufactured, because the slab’s flatness and where its aggregate happens to sit govern the pattern far more than the grinding does.
Minimal exposure. Mostly the cement surface with some sand and only occasional small stone showing — a subtle, quieter finish with just a hint of aggregate.
Nil (or very low) exposure. Little to no stone, aiming for a near-uniform cement surface. This is the most demanding look to achieve consistently, because with almost no aggregate to "read," any variation in the surface itself becomes more noticeable.
Exposure levels at a glance
General guidance using our terms — the actual result always depends on your slab. Exposure is a separate choice from sheen.
Note: "salt-and-pepper" (fine sand exposure, little large stone) is a related look often close to minimal — not a synonym for random.
| Level | Typical look | Grinding / cut | Dependence on the slab | Often suits |
|---|---|---|---|---|
| Full | Bold, terrazzo-like; large stones throughout | Deeper cut | High — needs suitable, well-distributed aggregate at depth, and flatness for evenness | Statement floors; feature living/retail spaces |
| Random | Variable amount of stone across the floor | Light or selective cut | High — slab flatness and aggregate placement govern the pattern | Natural, organic looks; realistic fit for varied slabs |
| Minimal | Mostly cement with some sand, occasional small stone | Lighter cut | Moderate | Subtle, calm interiors |
| Nil / very low | Near-uniform cement, little to no stone | Little or no aggregate-exposing cut; the exact process depends on the polishing system and slab | Very high — needs a flat, well-placed slab | Minimalist looks where the slab supports it |
Exposure and sheen are two separate decisions
It’s easy to conflate "how much stone shows" with "how shiny it is," but they’re independent choices, and it helps to see where the sheen actually comes from in each system. Exposure is about grinding depth and how much aggregate is revealed. Sheen — from a low sheen through to a high sheen — comes about differently depending on the finish:
Either way, exposure and sheen stay separate design decisions. You can pair full exposure with a lower sheen, or minimal exposure with a high sheen, and most combinations in between. Decide them separately.
- In mechanically polished concrete, the sheen is developed by mechanically refining the concrete through progressively finer polishing stages and by the final treatment applied to the surface.
- In grind and seal, the sheen comes primarily from the topical coating laid over the ground surface — matte through to gloss, set by the product chosen.
How grinding depth affects exposure — and its limits
Broadly, the deeper the initial grind, the more aggregate is revealed: a light cut exposes mostly the cement and sand, while a deeper cut reaches the larger stones. So grinding depth is the main lever for exposure — but it isn’t complete control. Deeper grinding can reach and expose larger aggregate, yet achieving consistent, even full exposure still depends on the slab being flat and on the aggregate being well placed and well distributed. The grinder can only reveal what’s actually there at that depth; if the aggregate sits unevenly, or there’s less of it in some areas, deeper cutting won’t manufacture an even spread of stone that isn’t there — it simply exposes whatever the slab contains. This is why aggregate distribution and flatness, not just grinding, determine the final look.
Why the slab itself matters so much
A mechanically polished floor’s appearance comes from the concrete, so how that slab was made largely decides what’s achievable:
Two slabs with the "same" concrete order can polish up differently because of how they were placed and finished. This is also why an existing slab is a case of discovering what’s achievable, while a new slab offers more scope to plan for it (more on that shortly).
- The mix and original placement determine what aggregate is present and how much.
- Placement and finishing together — the concrete mix, how it’s placed, vibrated, screeded and finished, and how flat it ends up — collectively affect where the aggregate settles and therefore what a given depth of grinding will encounter. It’s the combination of these steps that matters, rather than any single one of them acting on its own.
- Flatness matters enormously, especially for low-exposure looks (below).
Why nil and very low exposure depend on a flat, well-placed slab
Low- and nil-exposure finishes are the most sensitive to the slab. With little or no stone in view, the eye has nothing to distract it, so any undulation, trowel marks, colour variation or unevenness in the surface stands out. Achieving a convincing near-uniform cement look therefore relies on a slab that was well placed and is sufficiently flat — because the floor is following the surface it already has.
In practice, a genuine nil or "cream" finish is generally most achievable on a purpose-planned new slab, where the mix, placement, finishing and flatness can all be set up with that look in mind. On an existing slab, the picture is different: removing old coatings, adhesive residues, surface damage or contamination can take enough grinding that a true nil exposure becomes impractical — by the time the surface is sound and clean, the cut has often gone deep enough to start bringing up sand and stone. On a wavy or variable slab, grinding deeper to "even it out" simply exposes more aggregate rather than delivering a uniform cement look.
What deeper grinding can also reveal
Grinding down to reach larger aggregate doesn’t only bring up stone. Going deeper can also expose colour variation and ghosting, previous repairs and patches, and level or flatness differences across the floor; it interacts with edges and thresholds; and on some slabs it raises practical considerations about how much material can be removed and what lies within the slab, including reinforcement in thinner sections. None of this means deep grinding is wrong — it’s often exactly right for a full-exposure look — but it’s a reason the decision should be made with the specific slab in mind rather than from a photo alone.
Why edges and corners can differ from the main floor
The main "field" of a floor is ground with larger planetary machines, while edges, corners and areas around fixtures are reached with smaller edging tools. Because the tooling and the access differ, the exposure and finish right at the perimeter can read slightly differently from the open floor. A degree of difference is common — but it isn’t automatically something to accept, nor automatically a fault. Whether a given amount of edge variation is acceptable comes down to the agreed specification, the standard of workmanship, and the practical constraints of the site. It’s worth agreeing what’s expected at edges and thresholds before work starts.
Choosing exposure on a new slab vs discovering it on an existing one
There’s a real difference between the two situations. On a new slab, exposure can be planned for — the mix, aggregate and placement can be specified with the intended look in mind, which gives more scope (though still not a guarantee) to achieve a particular exposure. On an existing slab, you’re largely discovering what the concrete will allow: the aggregate, its distribution and the slab’s flatness are already set, so the realistic options are whatever that slab can deliver. Neither situation allows a promise of perfectly uniform exposure, but a new slab gives more room to aim for a target.
A note on samples
Samples and reference photos are useful for communicating a general design direction — roughly how much stone, what sort of look. What they can’t do is reproduce the exact aggregate distribution of another slab. Your floor has its own concrete and its own history, so it will have its own character even at the "same" nominated exposure level. Use samples to agree a direction, not as a precise prediction of your finished floor.
Exposure in mechanically polished concrete vs grind and seal
Aggregate exposure is created by grinding, so it belongs to the preparation stage of both mechanically polished concrete and grind and seal — in both, the slab is ground to a chosen exposure before it’s finished. What differs is what happens next. In mechanically polished concrete, the exposed, densified concrete is the finished surface.
In grind and seal, a topical coating goes over that ground surface — and the aggregate exposure remains visually relevant beneath it. Under a clear or translucent coating, the exposed stone still reads through (sometimes looking wetter or richer than a dry-ground surface). A pigmented or opaque coating, by contrast, can partly or completely obscure the exposed aggregate, so the exposure you ground in may barely show. Which coating is used therefore changes how — or whether — the exposure is seen.
Acid-etched or "pavilion"-style finishes are a different process again. Rather than mechanically grinding and polishing, they act chemically on the surface paste to reveal texture or aggregate in their own way. Because the mechanism is different, they shouldn’t be placed in the same exposure categories as mechanically ground finishes — treat them as a separate finish with its own look and characteristics.
The bottom line
Aggregate exposure — full, random, minimal or nil, in whatever terms your contractor uses — is one of the most important decisions in the look of a polished concrete floor, and it’s a separate choice from sheen. Grinding depth is the main lever, but the slab’s aggregate, placement and flatness ultimately decide what’s achievable, and a perfectly uniform result can’t be guaranteed. Decide the direction you want, understand that your slab has the final say, and confirm what’s realistic for your concrete before committing.
Frequently asked questions
What does aggregate exposure mean in polished concrete?
It’s how much of the stone (aggregate) within the concrete is visible in the finished surface — from lots of large stone (full) through to almost none (nil). It’s determined mainly by how deeply the slab is ground, within the limits of what the slab actually contains.
Is "random exposure" the same as "salt-and-pepper"?
Not necessarily. Salt-and-pepper usually means a fine exposure of sand and small particles with little large stone, while random exposure means a variable amount of stone across the floor — typically the result of a lighter cut meeting a slab’s high and low spots differently. They can look similar but describe different things, and terminology varies between contractors.
Can I choose exactly how much stone will show?
You can choose a direction, and grinding depth is the main control, but the slab decides what’s actually there to reveal. Aggregate that’s uneven or set deep can’t be evenly exposed just by grinding, so uniform exposure can’t be guaranteed — especially on an existing slab. Random exposure in particular is generally accepted or chosen as a look rather than precisely dialled in.
Does more exposure mean more gloss?
No — exposure (how much stone shows) and sheen (how shiny the finish is) are separate decisions. In mechanically polished concrete the sheen comes from mechanical refinement and the final treatment; in grind and seal it comes from the coating. You can combine most exposure levels with most sheen levels.
Why do the edges look a bit different?
Edges and corners are ground with smaller tools than the main floor, so some difference in exposure or finish at the perimeter is common. Whether a particular amount is acceptable depends on the agreed specification, the workmanship and the site’s constraints — so it’s worth discussing beforehand.
Trying to picture the right finish for your floor? Send us details and photos, and where helpful we can talk through the exposure and sheen that suit your slab and your space — and, on an existing floor, what’s realistically achievable. Get in touch for a quote.
Related pages
Thinking about a concrete floor?
Tell us about your space and we will come back to you with a free, no-obligation quote.